Tag Archive for: home owner tips

Flipping houses takes skill, creativity, and a lot of patience. Perhaps one of the trickiest parts to navigate when flipping houses comes after all the flipping is over–selling the house. Real estate flippers work with the goal to resell in mind, but negotiating prices with buyers, especially for a property that just went under major renovation, can prove difficult.

Incomplete air duct work.

One of the best ways for flippers to have guaranteed success in selling their homes is to have a pre-listing inspection performed by a professional before putting the house on the market. Four key benefits to a pre-listing inspection include:


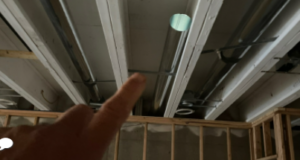
  • Recognizing or eliminating selling difficulty based on hidden damage or issues. Most selling problems aren’t from cosmetic problems, but from problems discovered in the structure, foundation, or systems (plumbing, electrical, etc) in a home. A pre-listing inspection can prevent you from having to lower a selling price. 


  • Addressing issues on your own terms. When you know of damage to the house before buyers do, you can take charge of how to fix issues before the house goes on the market. If a buyer notices an issue, they might want more credit for it in the listing price than it actually takes to resolve the problem. Plus, typically if a buyer sees one thing wrong, they will assume there are more issues, which impacts offers. 


  • Honest evaluations of the house and relationships with inspection companies. Hiring a home inspector before purchasing a home gives you an honest evaluation of what you’re getting into. Hire an inspector again after the flip is complete (before you list the home), can help ensure optimal selling practices and reduce potential issues that could come up during U&O or through a buyer’s inspection. Developing relationships with a home inspection company builds rapport and helps them understand your individual needs as a flipper, taking a lot of stress out of flipping in the long run.


  • Confidence in your abilities and credibility as a brand. Pre-sale inspection verifies all the work done on your house is up to code. And while some people think an inspection is the responsibility of the buyer, a pre-inspected, damage-free house builds your reputation as a trustworthy seller. It also allows you to maximize the selling price of your flipped home. 

At Musselman Home Inspection, we want to help you make homes the best they can be. Our pre-listing inspection is just one of the many services we offer to keep homes happy and healthy. If we can help you in any way, feel free to contact us, and we’d be happy to chat with you. 

The water pressure within each of our homes can vary. Typically, the closer your home is to the water source, the greater your water pressure will be.


When the pressure begins to run high, you can begin to hear “screaming” noises, loud metal bangs, and even experience water leaks throughout your home. If this sounds like your home, you’re going to want to install a pressure-reducing valve (PRV) to regulate it.


The PRV protects your home from excessive water pressure beyond what your plumbing fixtures were designed to handle. The valves in your home are designed for water pressure less than 80 pounds per square inch (psi).


Installing a PRV can be relatively simple; you can call your local plumber or follow our step by step video to do it yourself.


  1. First things first, in any kind of home maintenance that involves plumbing work, the water in your home needs to be shut off and drained. This will help you avoid a potential mess or water damage when tapping into your water system.
  2. Locate the lowest faucet that is closest to the main shutoff and open it.
  3. Open all other faucets in the home and flush all the toilets as well to drain your home’s water lines.
  4. Make a cut in the main water line using a pipe cutter leaving enough room to install the pressure reducing valve. Sand down ends of pipe where cuts were made to remove burrs.
  5. Slide the valve over top of the cut ends of the pipe and secure with glue.
  6. Turn the water valve back on and the job is complete!

Watch Jon & Jack demonstrate these steps in the video below.


PRVs can help to fix a number of issues including water waste, protecting water-using appliances, and reducing the energy needed to heat water in your shower, dish washer, etc.


Home maintenance doesn’t have to be a headache. Identifying the problem is the first step, and then, with a little time and effort, you can keep your home in tip-top shape saving you hundreds if not thousands in bills and other expenses. 

When any of our clients who have just purchased a home move in, one of the first things we tell them to do is to check their smoke alarms.


Far too many homes have the alarms overlooked and pushed to the wayside, and according to the National Fire Protection Association, nearly two-thirds of home fire deaths are caused by broken smoke alarms or the absence of them altogether.


Regular maintenance of the smoke alarms in your home is vital, and is easier than most expect.


First, you’ll want to be sure that each level of your home and each bedroom has an alarm present. Then, walk around to each one and press the “Test” button. If you hear a beep, everything is in working order. If not, it may need a battery or entire alarm replacement altogether. You’ll want to do these tests monthly.


If swapping out the battery doesn’t do the trick, we have a step-by-step on how to replace the entire hard-wired alarm (even if you aren’t an electrician):


  1. Make sure the power in the given room is shut off. We cannot stress the importance of this enough as live wires are highly dangerous.
  2. Remove the alarm from the ceiling and have the new one at the ready. There will be a top piece and a base that can be removed with a screwdriver or drill. Many smoke alarms come with a series of wires that you can match up to the existing wiring in the ceiling and plug right in with ease.
  3. Once the wire is connected, install the new base plate piece with either a screwdriver or drill. On the back of the alarm itself, there will be a place to jot down the date so you know when it was last replaced. Then, plug the other end of the wire into your alarm and connect it to the base with a slight twist until it locks into place.


A few more helpful tips for the smoke alarms in your home…


  • Purchase ones that are backed up by battery in case of a power outage
  • Dual smoke and carbon monoxide detectors are a great two-in-one option to keep your home safe
  • Keep a chart somewhere in your home that you can write down each time your alarms are tested and whether or not you had to replace the battery or alarm itself 
  • Replace batteries twice a year just to be safe, daylight savings is a good reminder to do so
  • Involve all members of your household with proper maintenance of alarms


In the video below, watch Jon demonstrate the replacement of a hard-wired smoke alarm so you can implement the steps in your own home’s detectors.

https://www.youtube.com/watch?v=uvuVD_8BHcI&t=35s

A fire extinguisher is something found in just about every home (or at least, they should be).


But how many of us actually know how to properly use one should the situation arise?


Without the knowledge of proper use, a fire extinguisher is practically useless.


The first thing you need to know is there are three components that make up a fire: a fuel source, oxygen, and a heat source.


Removing just one of these pieces will put a stop to the fire, and that is where your extinguisher comes into play.


When operating a traditional fire extinguisher, remember the acronym P.A.S.S.


PPull the pin.

AAim at the base of the fire.

S Squeeze the handle.

SSweep back and forth, until the fire is out.


Placement of the extinguishers in your home is vital as well. You want to make sure you keep them in the following potential hazard areas of your home for ease of access:


  • Kitchen – this is where the majority of home fires start. Keep an extinguisher handy, but away from any sources of heat, like under your sink.
  • Laundry room – your dryer is another big hazard.
  • Garage – Chemicals, vehicles, and other machinery are all known for starting fires.
  • Outdoors – Fire pits and grills, though outside of the home, can easily spread to structures.


Watch the video below for a helpful visual demonstration by Jon of a few different types of extinguishers.


https://www.youtube.com/watch?v=H3r3Vc75tD4

One of the top causes of house fires are dryer vents that are clogged from years of neglect.


With all of the lint and debris stuck in your clothes dryer, it creates the perfect conditions for a fire to catch and spread quickly throughout the home.


The easy-to-remove filter that we often scrape clean after each load of laundry is just the surface of the lint that is inside your machine and throughout the ventilation system.


To be safe, we have to get inside the works and make sure we get it all out. 


Cleaning your dryer vent at least once a year can put your mind at ease that there is one less potential fire hazard lingering in the hidden parts of your home.


But how does one go about getting inside the dryer and clearing it’s vents?


Jon has created a video that you can watch below that goes over all of the necessary tools and a complete demonstration on cleaning out your dryer vent.


https://www.youtube.com/watch?v=BtngOUo1PAg


Some ventilation systems, however, are not as easy to access as the one in the video above. In these cases, you will want to hire a professional duct cleaner to handle the job. A small expense to pay for the assured safety of your home and family.

The last of the leaves are finally falling from the trees…and right into your gutters.


It’s mid-to-late fall, and the gutters on your home are likely at maximum capacity, having endured months of debris build-up and clogging them to the point that water can no longer drain through.


Though it may seem insignificant, when this clogging occurs, you could be in for more serious problems down the line. When rain water has no route of exit from your roof, it can begin pooling in places that will cause leaks in your roof or even cracks in the foundation of your home.


To avoid this from happening, we recommend cleaning out your gutters regularly as it is crucial to a safe and healthy home and here are just a few reasons why:


  1. Prevents water damage. Rainwater won’t drain properly when gutters are filled with debris. When that water overflows, it can cause water damage to the interior and exterior of your home.


  1. Protects your roof. With clogged gutters, rainwater has nowhere to go, leaving you with a rotten or a leaky roof.


  1. Keeps pests from causing trouble. Gutters full of leaves and what not can make desirable homes for rodents, birds, and insects. Keep those critters at bay by keeping them clear.


  1. Reduces the risk of a cracked foundation. That rainwater with nowhere to go can pool around the foundation of your home and crack it when expanding and freezing happens in the winter months.


  1. Saves you money. A clean gutter can help prevent expensive future repairs. Take preventative measures now to avoid a costly bill.


There are many companies out there that offer gutter-cleaning services, however, if you are more of a DIY person, there are also plenty of tools on the market designed specifically for this task.

To get this done with ease and as little mess as possible, the best tool for the job is a wet/dry vacuum to suck up all of the debris. This avoids any scooping out or blowing around of the junk that’s caught in there.

Wood-destroying insects, or WDIs, are not limited to just termites. Carpenter bees, carpenter ants, and various beetles such as the Wharf Borer are all examples of common insects that love nothing more than to make a meal out of the wood in your home.


The havoc they can wreak on wooden structures is extremely dangerous for any type of home;

First, they look for the kind of wood they prefer: damp or rotting wood that is easier to chew. Then, starting with small, almost invisible holes, they work their way inside and continue chewing until a vast network of tunnels has spread throughout inches if not various feet of your home and weakening the structures severely.

Once these pests have made themselves at home, chemicals to kill off the nest and removal and replacement of damaged wood will be necessary. Preventing future infestations, however, is always a possibility.


To ensure your home does not fall victim to a hoard of wood-hungry critters, the following measures can be taken:


  • Making sure the wooden structures around the outside of your home are stained or painted and do not make direct contact with the soil
  • Keeping moisture levels to a minimum by fixing leaky pipes or faucets, cleaning gutters, or use pressure-treated wood
  • Seal any and all possible entryways to your home such as cracks in foundation, ducts, and around windows, doors, and air conditioners
  • Inspect any kinds of wood brought in to your home to see if they’ve been stored properly, including antiques
  • have at least a 2-inch clearance between the house and planter boxes or soil-filled porches
  • eliminate all wood-to-soil contacts such as trellises, fence posts, stair casings and door facings
  • separate shrubbery from the house to help make it easier to inspect the foundation line
  • remove wood scraps or stumps from around foundations
  • have at least 12″-18″ clearance between floor beams and the soil underneath

Nothing is worse than stepping into your basement and being ankle-deep in water.


When your sump pump fails, it can quickly lead to flooding that not only can have a negative effect on the foundation of your home, but ruin just about anything stored in your basement as well. But most of us want to avoid the possibility of this failure from ever happening, so, how do you know how to care for your pump and when it needs replaced?


An important piece of information to know is that, just like any mechanical device, your sump pump has a lifespan.


Specifically, 8-12 years is the average time frame you’ll be able to get out of it before replacement is necessary. If you aren’t sure how old the pump is, but know that your house is over that 8-12 year limit, it’s a good idea to swap it out proactively.


To make sure the pump that you do have installed is running properly and efficiently to maximize that lifespan, there’s a few things you can do to regularly maintain it.


First, we want to take a look into the water inside the pump to make sure there’s no dirt and debris inside that could be clogging certain elements, making it work harder and straining the system.


Next, there will be a switch inside that you can pull up to test that everything is in working order, water is flowing as it should, and even be able to pin-point where something might not be functioning so you can repair it ASAP.


Watch Jon in this video below demonstrate step by step how to check to see if your sump pump is in good health:


At Musselman Home Inspection, we like to be a resource for all things home maintenance, and this specific piece of equipment falls into that category. For more information and assistance on any and all things sump-pump, feel free to reach out and we will be more than happy to provide demonstrations, recommendations, and any additional help you might need.